From the start of Pi 2B in the United Kingdom to the Pi 3B tossing, I am also a half-Pi fan. I also shared on my personal website a tutorial on how to build the Raspberry Pi into a home media center by installing OSMC. After seeing this article last month, Aunt Zhang saw the idea of ​​upgrading. She wanted to quickly upgrade the Raspberry Pi to a family hub that integrates media and smart devices. After that, I also reviewed a large number of tutorials and forum questions and answers on other websites and extranets, tried the code repeatedly, and proposed the following method and successfully implemented it.
 When Homekit met Xiaomi's smart home and wanted to build a smart bedroom from high school, now 5 years have passed since the launch of Homekit, it has been concerned because it has always been a fruit powder, but faithful recharge can not afford to hurt, homekit accessories It is too expensive. Millet just out of the router. In the plug-in there is a homekit plug-in, but the price is too high, and is not practical, can not add their own accessories later, can only use millet accessories. A few days ago from the Wei Feng Forum to see Yang_John| Like 112 Comments 173 Favorites 944 View Details
 This article refers to the code and content are: Wei Feng Hahalibo's tutorial, what is worth buying Yang_John's share, Homebridge Github source code, Home Assistant Github source code, thanks to the above mentioned author's share.
In Yang_John's article review, it was also suggested that the "homebridge-aqara" plug-in could be used to implement the millet gateway's access to Homekit, which is exactly the same as the practice of the minority Junyi. This method is simple and easy to understand, and installs code on one line, but this method has a drawback: Since the millet gateway 2 is regarded as a "bridge", the function of controlling the night light of the gateway itself is missing. Everyone can take what they need.
To integrate Raspberry Pi as a family hub, there are three ways to choose from: 1. Using Raspbian as the root system, install Home-assistant intelligent control system and KODI media system; 2. Use OSMC (KODI) media system as the root system, and then install Home-assistant intelligent control system; 3. With the Hassbian intelligent control system as the root system, install the KODI media system.
The above three methods are identical in terms of performance and can support the latest Raspbian and Kodi version 17. I have also tried all of them, and I don't have much to say about the mental path. All in all, I finally chose method 3 to operate. The following tutorial is also based on Method 3, but I have also taken into consideration some of the other two methods.
I. Installing the Hassbian system and settingsThe entire installation process basically refers to Yang_John and Lao Gao's tutorials. I will not go into details, and everyone can get it directly. Based on installation experience, I will add a few special points here:
The official tutorial tells that the initial start-up needs to wait for about 5 minutes. Based on the domestic network environment, I have to test here several times. All of them need to wait for nearly 10 minutes. Therefore, everyone should not be anxious and wait a bit.
If you want to start the media function, you also need to adjust the GPU-memory to more than 160MB.
If it is a Hassbian system, the SSH function is enabled by default. Other systems should be opened in the settings.
It is recommended to set the WIFI function of the Raspberry Pi. The Raspberry Pi 3 comes with a WIFI module.
enter:
Sudo nano /etc/wpa_supplicant/wpa_supplicant.conf
Add at the tail
Network={ ssid="your wifi name" psk="wifi password" }
Then ctrl+x,y, Enter (Remember this operation will be used frequently in the future)
Now our Raspberry Pi can operate freely from the network cable.
People in the heavenly partner, it is best to replace the source: sudo nano /etc/apt/sources.list in the first line to add "#", and then add the following code at the top:
Deb http://mirrors.aliyun.com/raspbian/raspbian/ jessie main non-free contrib
Deb-src http://mirrors.aliyun.com/raspbian/raspbian/ jessie main non-free contrib
Deb http://pipplware.pplware.pt/pipplware/dists/jessie/main/binary/,
Then press ctrl+x,y, Enter. There is one more line here than the original one for future installation of KODI.
Mac's method of using smb service is: open finder, click on the toolbar to the "go", select the bottom of the "to the server", and then enter the address:
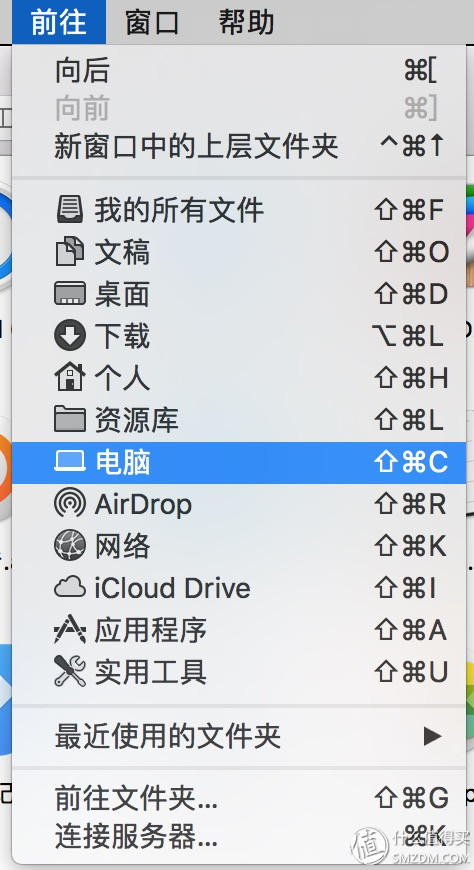 Finder
 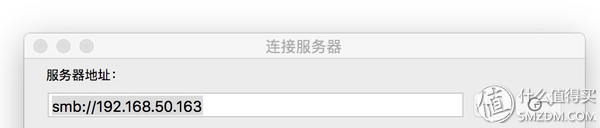 Smb
Smb
The original tutorial seems to lack the installation of SMB and MQTT services. I will add it here.
2.1 Installing SMB
Sudo ./hassbian-scripts/install_samba.sh
Sudo smbpasswd -a pi
Sudo mv /etc/samba/smb.conf /etc/samba/smb.conf.original
Sudo nano /etc/samba/smb.conf
[global]
Netbios name = raspberrypi
Server string = The Pi File Center
Workgroup = WORKGROUP
Hosts allow =
Remote announce =
Remote browse sync =
[HOME ASSISTANT]
Path = /home/homeassistant/.homeassistant
Comment = No comment
Browsable = yes
Read only = no
Valid users =
Writable = yes
Guest ok = yes
Public = yes
Create mask = 0777
Directory mask = 0777
Force user = root
Force create mode = 0777
Force directory mode = 0777
Hosts allow =
Ctrl+x,y, Enter
Then enter sudo systemctl restart vice
2.2 Installing MQTT
Sudo ./hassbian-scripts/install_mosquitto.sh
Sudo systemctl start mosquitto
Going back to the Raspberry Pi, enter the following code. The first step is to get the source address certified. The default Kodi version of Raspbian sources is 15. However, the latest version has reached 17, and only the source currently supports installing the latest version of Kodi, which is why the source was added in the previous steps:
Wget -O - http://pipplware.pplware.pt/pipplware/key.asc | sudo apt-key add -
Sudo apt-get install kodi
Sudo addgroup --system input
Sudo nano /etc/udev/rules.d/99-input.rules
copy and paste
SUBSYSTEM==input, GROUP=input, MODE=0660
KERNEL==tty[0-9]*, GROUP=tty, MODE=0660
Ctrl+x,y, carriage return input:
Sudo nano /etc/udev/rules.d/10-permissions.rules Copy and paste
#input
KERNEL=="mouse|mice|event", MODE="0660", GROUP="input"
KERNEL=="ts[0-9]|uinput", MODE="0660", GROUP="input"
KERNEL==js[0-9], MODE=0660, GROUP=input#tty
KERNEL==tty[0-9]*, MODE=0666
#vchiq
SUBSYSTEM==vchiq, GROUP=video, MODE=0660
Ctrl+x,y, Enter, enter:
Sudo usermod -a -G audio pi
Sudo usermod -a -G video pi
Sudo usermod -a -G input pi
Sudo usermod -a -G dialout pi
Sudo usermod -a -G plugdev pi
Sudo usermod -a -G tty pi
At this point, the latest version 17.1 of KODI has been installed, and everyone can enter Kodi to enter more detailed settings.
IV. Adding KODI to Startup Auto Task
Cd /
Sudo systemctl daemon-reload
Sudo systemctl enable homebridge
Sudo systemctl start homebridge
Sudo systemctl status homebridge
Sudo wget -O /etc/init.d/kodi https://gist.githubusercontent.com/shyamjos/60ea61fd8932fd5c868c80543b34f033/raw;sudo chmod +x /etc/init.d/kodi
Sudo systemctl enable kodi
Sudo systemctl enable mosquitto
OK, after restarting, wait a bit and a perfect family hub is born! Turn on the Homebridge and Homeassistant functions by default. And jump directly to the KODI interface, smart home + smart audio and video are a lot of ~ Raspberry pie perfectly upgraded into a family center!
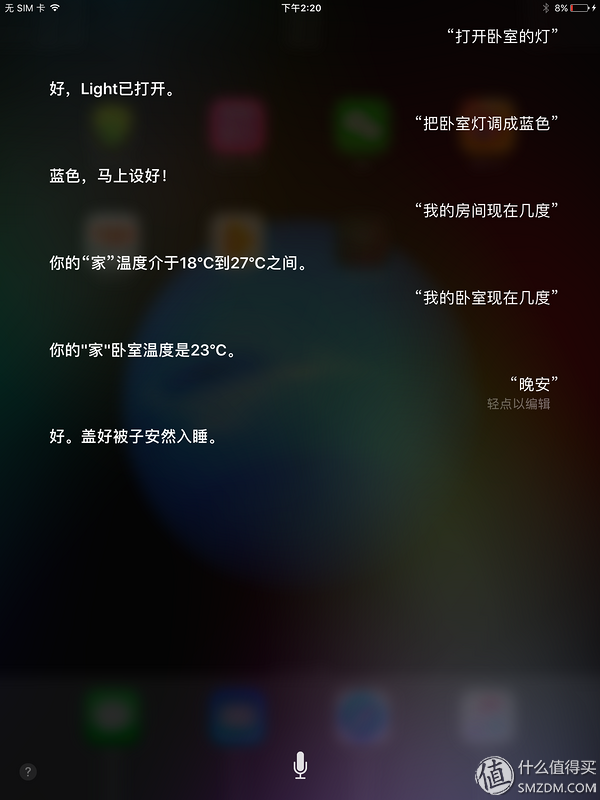 Siri
Siri
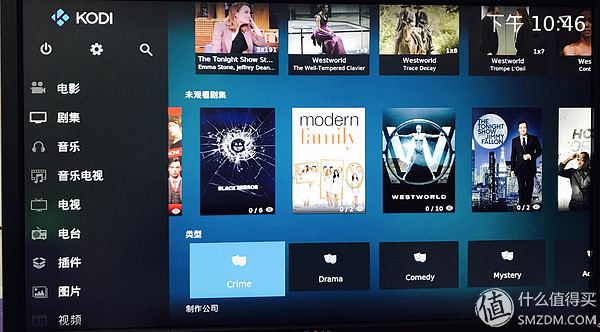 Kodi
Kodi
Since it is a system, it will inevitably be upgraded. I hereby provide HAAS routine maintenance commands:
$ sudo apt-get update
$ sudo systemctl stop vice
$ sudo su -s /bin/bash homeassistant
$ source /srv/homeassistant/bin/activate
$ pip3 install --upgrade homeassistant
$ exit
$ sudo systemctl start vice
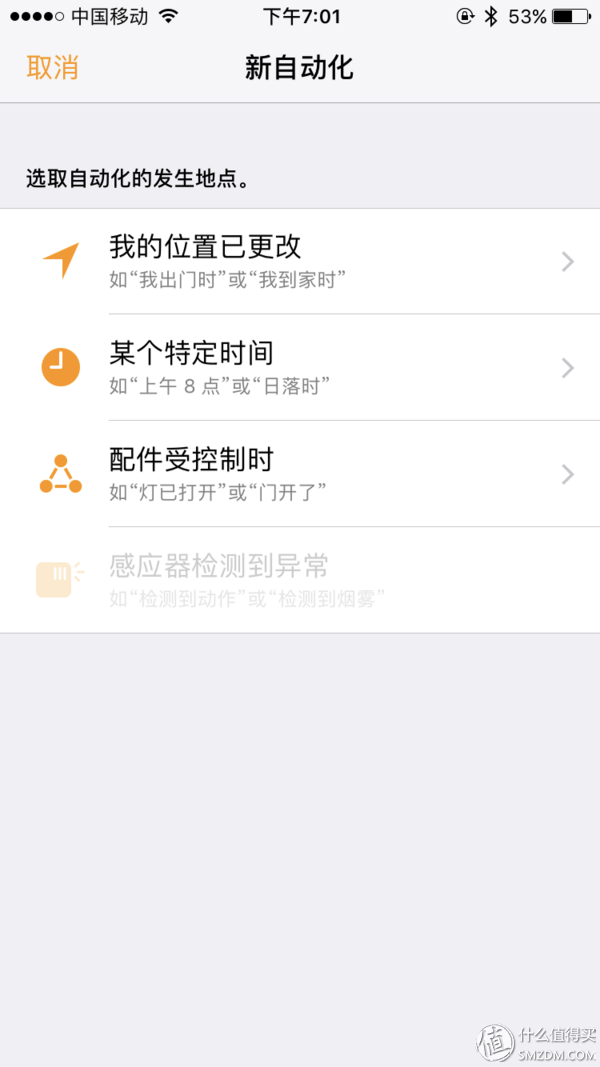
In fact, there are many ways to install automation tasks for the entire system: You can use the home app, Homeassistant settings, and home apps.
Just had an ipad mini 2 at home, I used it as a Homekit hub, the advantage is that outside the LAN can also control the device, without configuring the network penetration.
This is a special vozol bar lite electronic cigarette product series. We sell Vozol Vape, Vozol Vape Pen, vozol vape 3000 Puffs, and other vozol vapes.
We are specialized electronic cigarette manufacturers from China, Vapes For Smoking, Vape Pen Kits suppliers/factory, wholesale high-quality
products of Modern E-Cigarette R & D and manufacturing, we have the perfect after-sales service and technical support. Look forward to
your cooperation!
vozol bar lite vape, vozol bar lite vape pen, vozol bar lite 600 puffs vape,vozol bar lite disposable vape kit,vozol bar lite vape kit
Ningbo Autrends International Trade Co.,Ltd. , https://www.mosvapor.com